Coding Agents
Coding agents are private terminal workspaces for AI coding tools such as Codex, Claude Code, Gemini CLI, OpenCode, and generic command-line assistants.
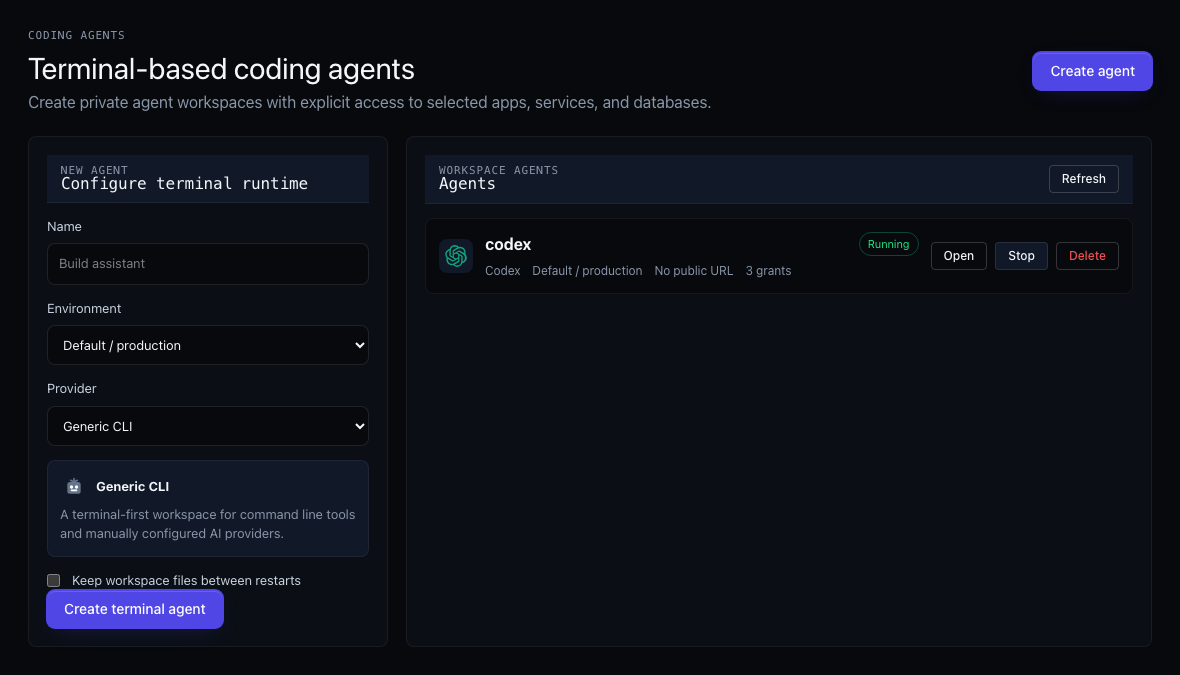
They are not public services. A coding agent has no public app URL, is opened from the Moltern dashboard, and receives access only to the applications, services, and databases you explicitly select.
How Coding Agents Work
The workflow has five parts:
- Create an agent in a specific environment.
- Choose the provider CLI you want to use.
- Sign in to that provider from the terminal or save an optional provider API key.
- Grant the agent read or connection access to selected apps and services.
- Open the terminal and run the agent against the generated workspace context.
The agent runtime includes bash, git, common shell utilities, and provider CLIs for claude, codex, gemini, and opencode when the current runtime image includes them.
Use coding agents when you want to:
- run an AI coding assistant close to your Moltern workloads
- inspect app and service context without copying credentials to your laptop
- grant temporary access to one service or database, then remove it later
- keep commands, generated files, and provider login inside a private terminal workspace
- use multiple terminal tabs for parallel work such as app changes, database checks, and tests
Choose A Provider
Choose the provider based on the CLI your team already uses. The permission model is the same for every provider.
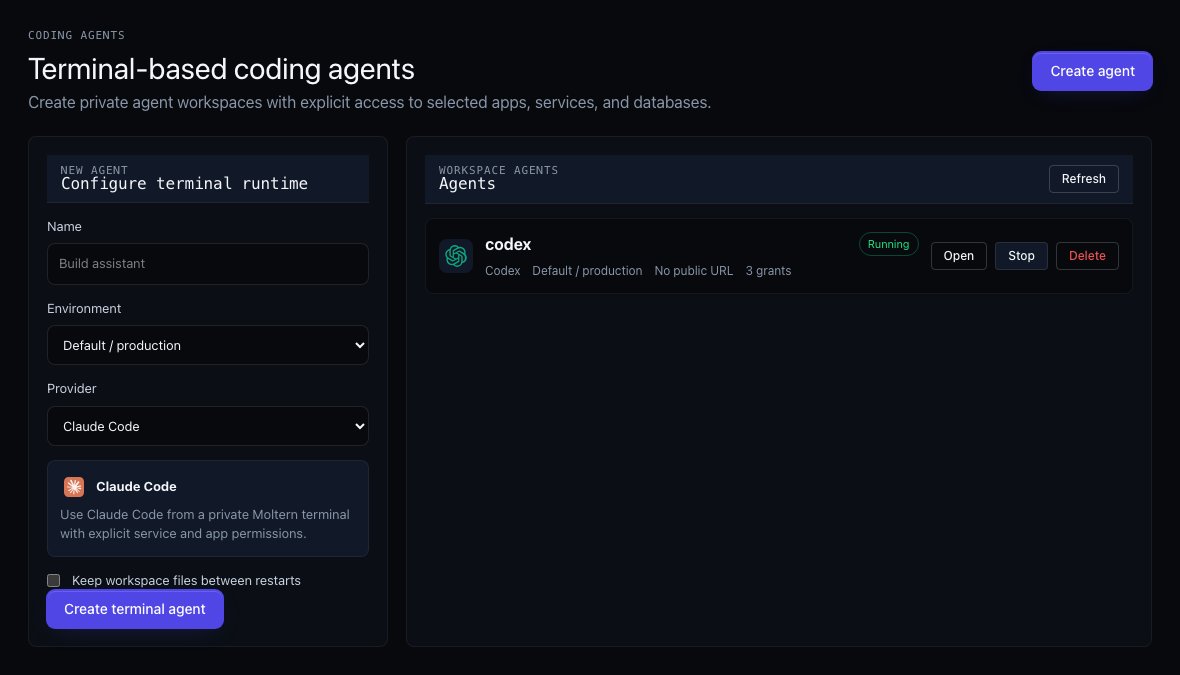
| Provider | Command Moltern Starts | Best For | Auth Options |
|---|---|---|---|
| Codex | codex | OpenAI Codex CLI workflows | Terminal login or optional OpenAI API key |
| Claude Code | claude | Claude Code terminal workflows | Subscription login or optional Anthropic API key |
| Gemini CLI | gemini | Google Gemini CLI workflows | Google login or optional Google API key |
| OpenCode | opencode | OpenCode-compatible workflows | Terminal login or optional provider API key |
| Generic CLI | Bash shell | Manual tools, custom CLIs, one-off scripts | Optional provider API key |
If the selected command is not available in the runtime, Moltern shows a clear message and opens bash in the same workspace so you can continue manually.
Create An Agent
- Open Coding Agents from the Moltern sidebar.
- Enter a clear name, such as
Codex workspaceorDocs migration assistant. - Choose the environment where the agent should run.
- Choose the provider.
- Decide whether to keep workspace files between restarts.
- If persistence is enabled, choose the workspace storage size.
- Select Create terminal agent.
After creation, Moltern opens the agent detail page.
Persistent Workspace
Use a persistent workspace when the agent needs to keep files, package installs, generated patches, or provider login state between restarts.
Use an ephemeral workspace when the agent is only needed for a short task and you do not want files to remain after restart or deletion.
Persistent workspace storage counts toward workspace usage while the agent exists.
Configure Provider Access
The Overview tab shows runtime details and provider sign-in options.
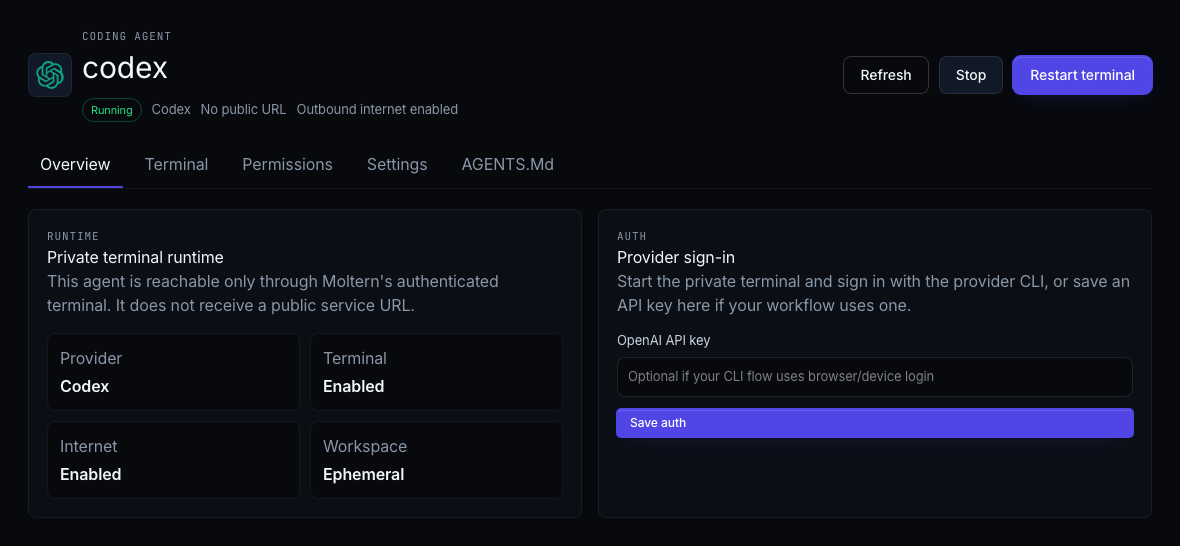
Most provider CLIs support interactive sign-in from the terminal. For those providers:
- Start the agent.
- Open the Terminal tab.
- Let Moltern start the selected CLI.
- Follow the provider login flow in the terminal.
Some workflows use API keys instead. In that case:
- Open the Overview tab.
- Paste the provider key into the provider field.
- Select Save auth.
- Restart the terminal if the agent was already running.
Saved provider credentials are write-only from the UI. Moltern does not show them again after saving. To rotate a value, paste the replacement and save again.
Grant Access To Apps And Services
Open the Permissions tab to decide what the agent can see or connect to.
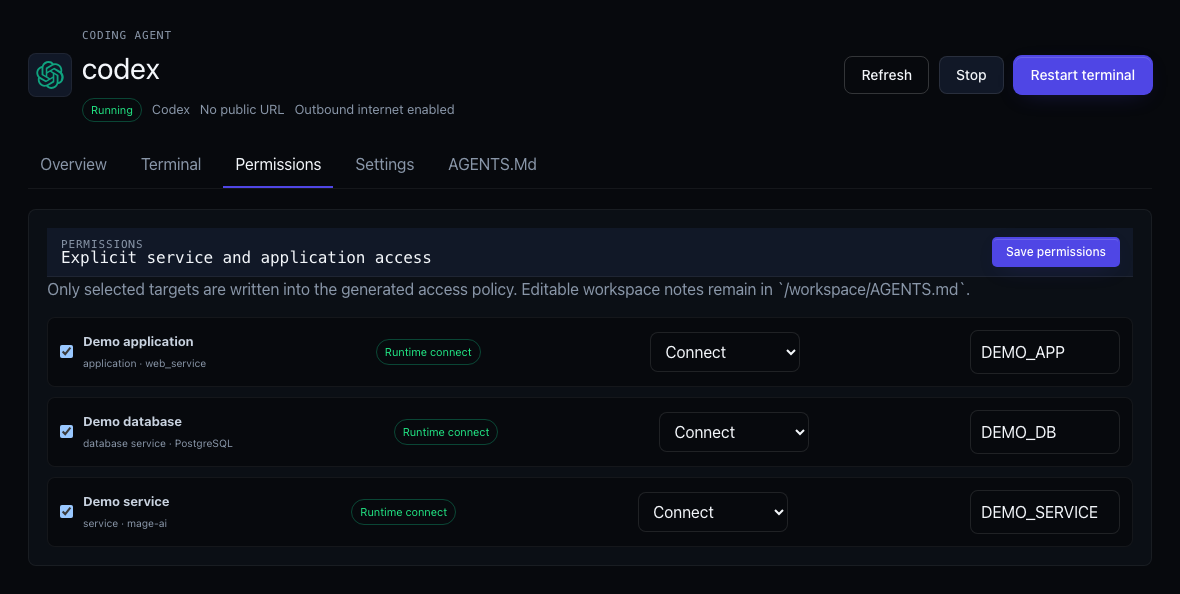
Each target can be an application, service, or database service. Each selected target has a scope.
| Scope | What The Agent Receives | Use When |
|---|---|---|
| Read context | Target name, type, and basic context in AGENTS.md | The agent only needs to understand the architecture or write code against a known service |
| Connect | Runtime variables for selected apps or services | The agent needs to call an app URL or connect to a selected service from the terminal |
| Admin hint | Elevated setup aliases when the target supports managed credentials | The agent is performing setup or repair work that requires generated admin connection details |
No grant means the agent receives no private context or connection data for that target.
Runtime Connect Vs Read Context Only
The label beside each target tells you what Moltern can safely prepare.
- Runtime connect means the target can receive runtime variables. For an application this can include a URL variable. For a managed service or database this can include connection variable names.
- Read context only means the agent can see the target in
AGENTS.md, but Moltern will not add runtime connection variables for it.
If Connect is disabled for a target, choose Read context unless you first change the target so it exposes safe connection details.
Runtime Aliases
Each grant has an alias. The alias becomes the prefix for variables in the terminal.
Example:
| Target | Alias | Example Variables |
|---|---|---|
| Storefront API | STOREFRONT | STOREFRONT_URL, STOREFRONT_APP_ID |
| Orders database | ORDERS_DB | ORDERS_DB_HOST, ORDERS_DB_DATABASE, ORDERS_DB_USERNAME, ORDERS_DB_PASSWORD |
Use short, clear aliases. Avoid generic names like DB when the agent can access more than one target.
Save And Restart
After changing permissions:
- Select Save permissions.
- Restart the agent if it is already running.
- Open
AGENTS.mdor the terminal to confirm the updated policy.
Moltern refreshes the generated access block when the runtime starts. If a running terminal still shows old access, restart the agent.
Understand AGENTS.md
/workspace/AGENTS.md is the main instruction file for the agent.
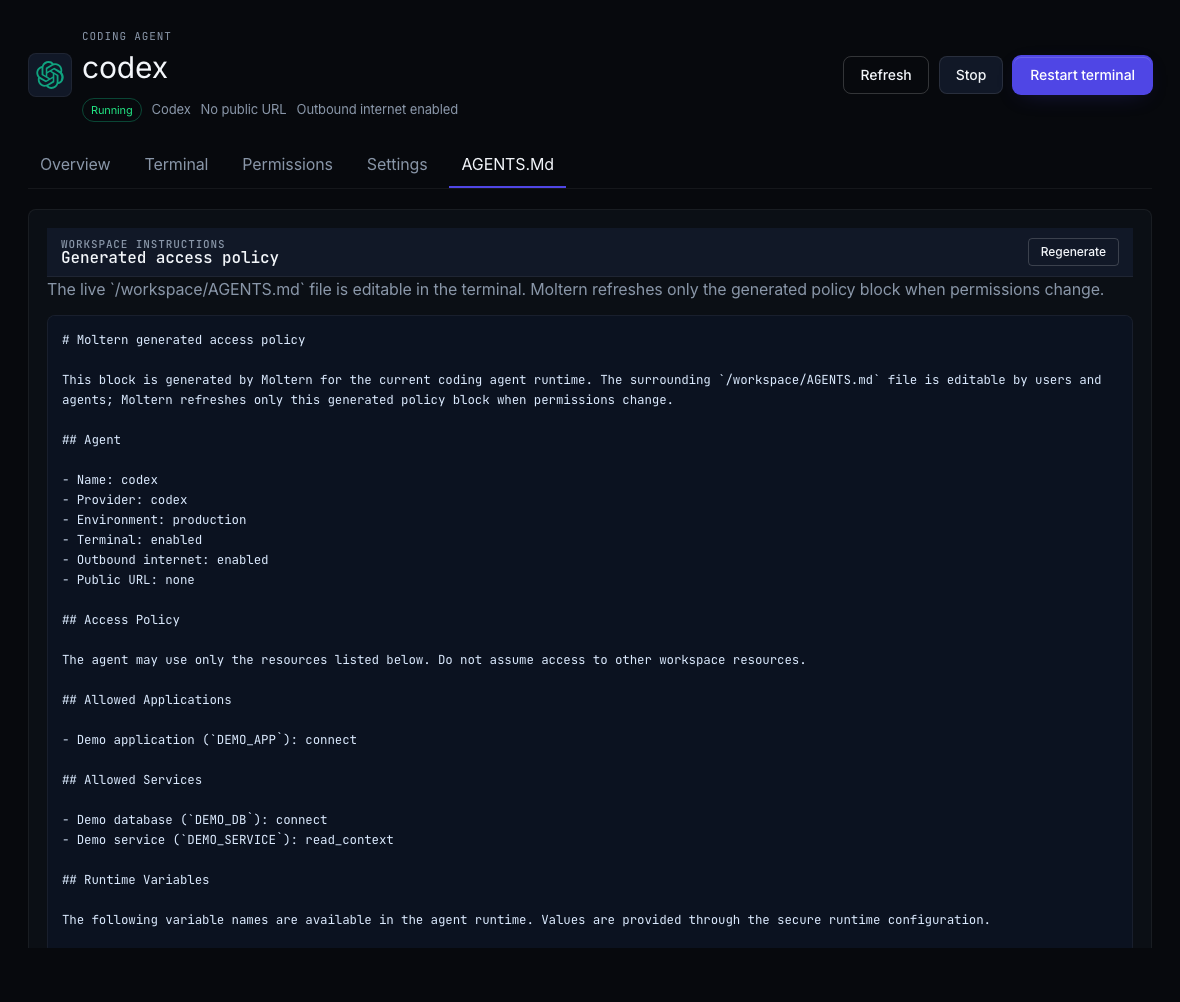
The file has two important parts:
- A generated access block managed by Moltern.
- Your editable workspace notes below or around that block.
The generated block lists:
- agent name and provider
- whether the terminal and internet access are enabled
- allowed applications
- allowed services and databases
- runtime variable names
- restrictions the agent should follow
The generated block lists variable names only. Sensitive values are provided to the runtime separately and are not printed in the docs page, AGENTS.md, or the UI preview.
Provider-specific instruction files are also prepared:
CLAUDE.mdpoints Claude Code at the same instructions.GEMINI.mdpoints Gemini CLI at the same instructions.- Codex and OpenCode can read
AGENTS.mddirectly from the workspace.
You and the agent can edit AGENTS.md. Moltern refreshes only the generated policy block when permissions change, then keeps your notes.
Open The Terminal
Open the Terminal tab after the agent is running.
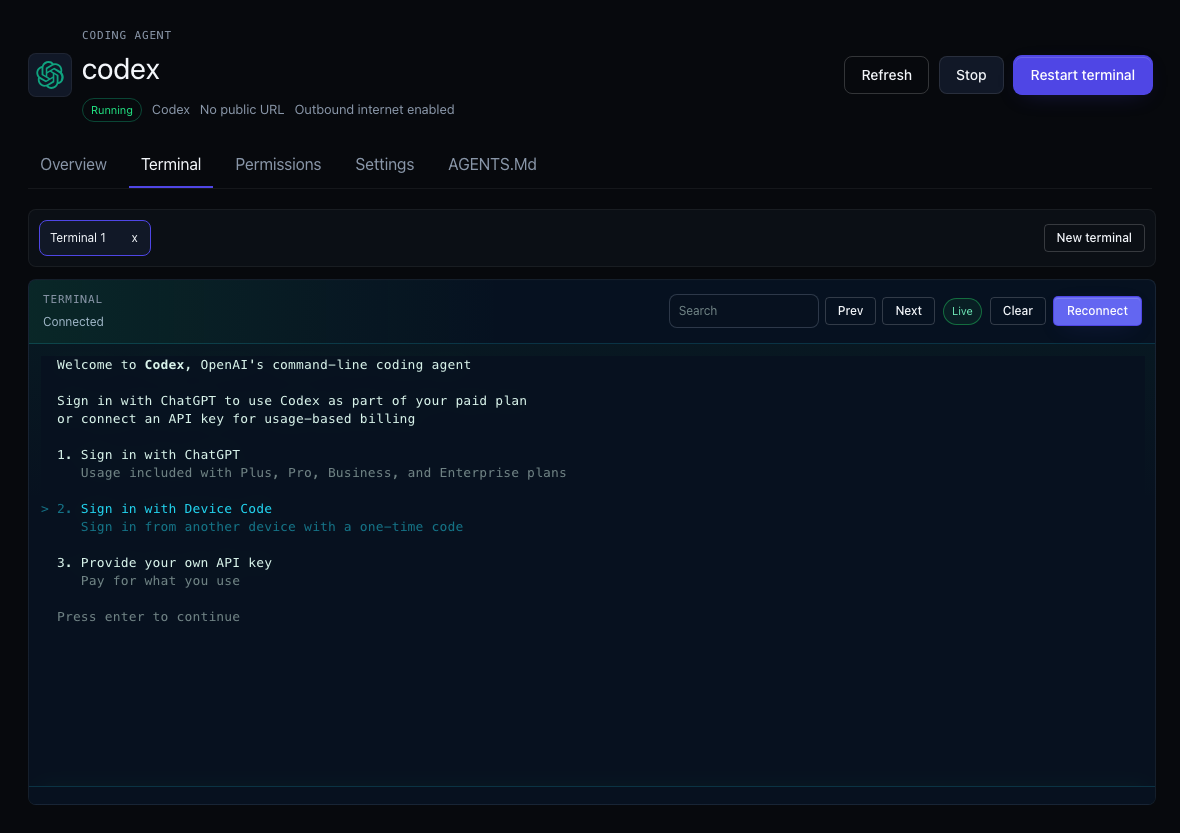
The terminal supports:
- automatic provider CLI launch
bashfallback when the provider command is unavailable- terminal search
- visible scrollbar
- browser scrollback
- shell command history for the runtime session
- multiple terminal tabs backed by reusable sessions
Moltern starts the selected provider command when available:
codex      # Codex agent
claude     # Claude Code agent
gemini     # Gemini CLI agent
opencode   # OpenCode agent
Useful first checks:
pwd
cat /workspace/AGENTS.md
which codex claude gemini opencode
env | sort
Do not print secrets in shared logs, screenshots, issues, pull requests, or documentation.
Multiple Terminal Tabs
Use multiple tabs when you want separate sessions for different tasks:
- one tab for the provider CLI
- one tab for package install or test commands
- one tab for checking an application or database connection
Closing a tab ends that terminal session. Reopening the same tab reconnects to the existing session when it is still available.
Work With Connected Services
After you grant Connect access, the terminal can use the generated variables.
Example pattern for an application URL:
echo "$STOREFRONT_URL"
curl -I "$STOREFRONT_URL"
Example pattern for a database service:
echo "$ORDERS_DB_HOST"
echo "$ORDERS_DB_DATABASE"
Use the client or framework that matches your service. If a database client is not installed in the agent runtime, install it in the workspace or use a development service designed for that database workflow.
Update Settings Or Delete An Agent
The Settings tab controls the agent workspace.
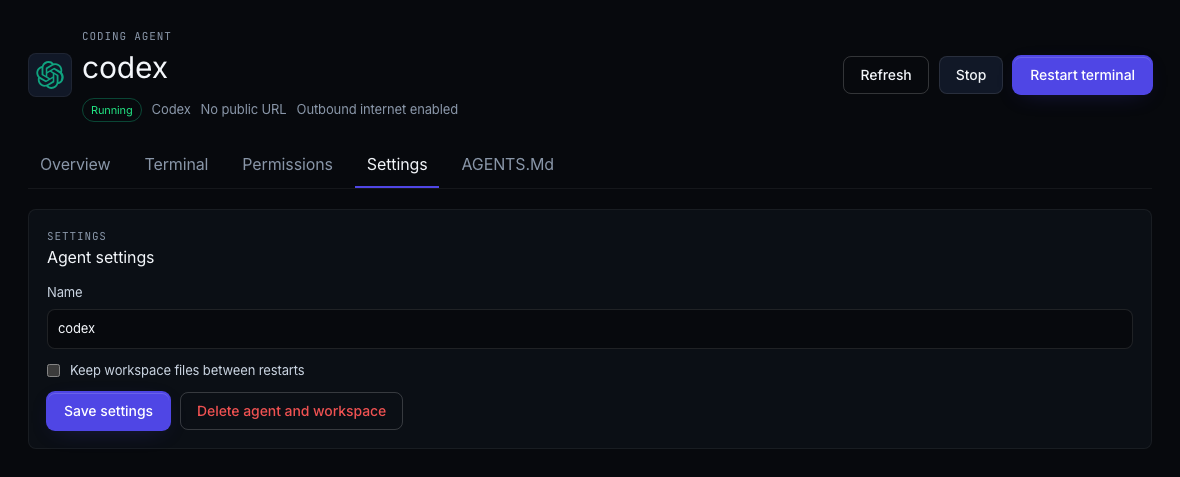
You can:
- rename the agent
- enable or disable persistent workspace files
- change workspace storage size
- delete the agent and workspace
Delete unused agents when a task is complete. Deletion removes the agent runtime, terminal sessions, saved grants, and persistent workspace storage when it was enabled.
Security Checklist
Before starting an agent:
- Grant only the apps and services needed for the task.
- Prefer Read context when the agent only needs architecture context.
- Use Connect only when the terminal must call or connect to the target.
- Use Admin hint only for setup or repair work.
- Keep aliases specific enough to avoid mistakes.
- Restart the agent after permission changes.
- Revoke grants or delete the agent when the task is complete.
Coding agents should be treated like active developer workspaces. They can run commands and use any runtime variables you grant to them.
Billing And Resource Notes
Running agents and persistent workspaces consume workspace resources.
To control usage:
- stop agents when they are not being used
- delete short-lived agents after the task is done
- use ephemeral workspace mode for quick tasks
- keep persistent workspace storage sized to the actual task
Troubleshooting
Terminal Is Unavailable
Start or restart the agent and wait for the runtime to become ready. If it still fails, refresh the page and open a new terminal session.
Provider CLI Does Not Start
If the terminal says the selected CLI is not installed, restart the agent after the latest runtime image is deployed. Moltern opens bash so you can continue manually.
Provider Login Does Not Work
Check whether that provider expects browser login, device-code login, subscription login, or an API key. If you changed the provider credentials from the Overview tab, restart the terminal.
A Service Is Missing From AGENTS.md
Open Permissions, select the service, choose the right scope, save permissions, and restart the agent.
Connect Is Disabled For A Target
Use Read context for that target. Connect is available only when Moltern can prepare safe runtime variables for the target.
A Revoked Service Still Appears In The Terminal
Save permissions again, restart the agent, then inspect /workspace/AGENTS.md.
The Agent Cannot Reach A Package Registry Or Provider API
Confirm the agent is running and that the provider command is using the expected login or API key. Some provider CLIs also need you to finish an interactive login flow before they can call their API.